Make do and mend |
Because of coronavirus and social distancing, we can't go out and take photos and go in the dark room as we would usually do, we can't leave the classroom during lessons, we have to use hand sanitizer constantly and wear face masks mostly all the time. This global pandemic has made people adapt to the situation and now wearing face masks and sanitizing all the time is the new normal. In school, we have to wear badges with our year number on it and we have to line up in tutor groups after every class and sanitize after very lesson and wear face masks when walking to lessons and in crowded places. The restrictions in our photography classrooms are a challenge because we do the majority of our work outside or in the dark room. These restrictions can help us to be more creative because we are going to have to use the things around us to make do and mend. Artists are good at solving problems because they are imaginative and creative all the time . They are creative and imaginative to come up with ideas for their work so for them they can solve problems with more ease than others.Make do and mend suggests that we have to make do with what we have already e.g the classroom and use resources in there to create photos.
|
Instructions
In order to take a photograph you have to make choices. What happens when these choices are made for you?
My instruction:
- where we stand
- what the subject is
- the angle
- the height
- the type of lighting/if we want lighting
- what's in the photo
- how far/close we take the photo at
- the clothes you wear
- the time you take the photo at
- the surroundings
- whats in the frame/out of frame
- whats in/out of focus
My instruction:
Take a photo involving 3 different colours from around a metre distance outdoors at 5pm.

I took this photo in my garden. The three colours are green, orange and blue .
Marcel Duchamp & the Readymade
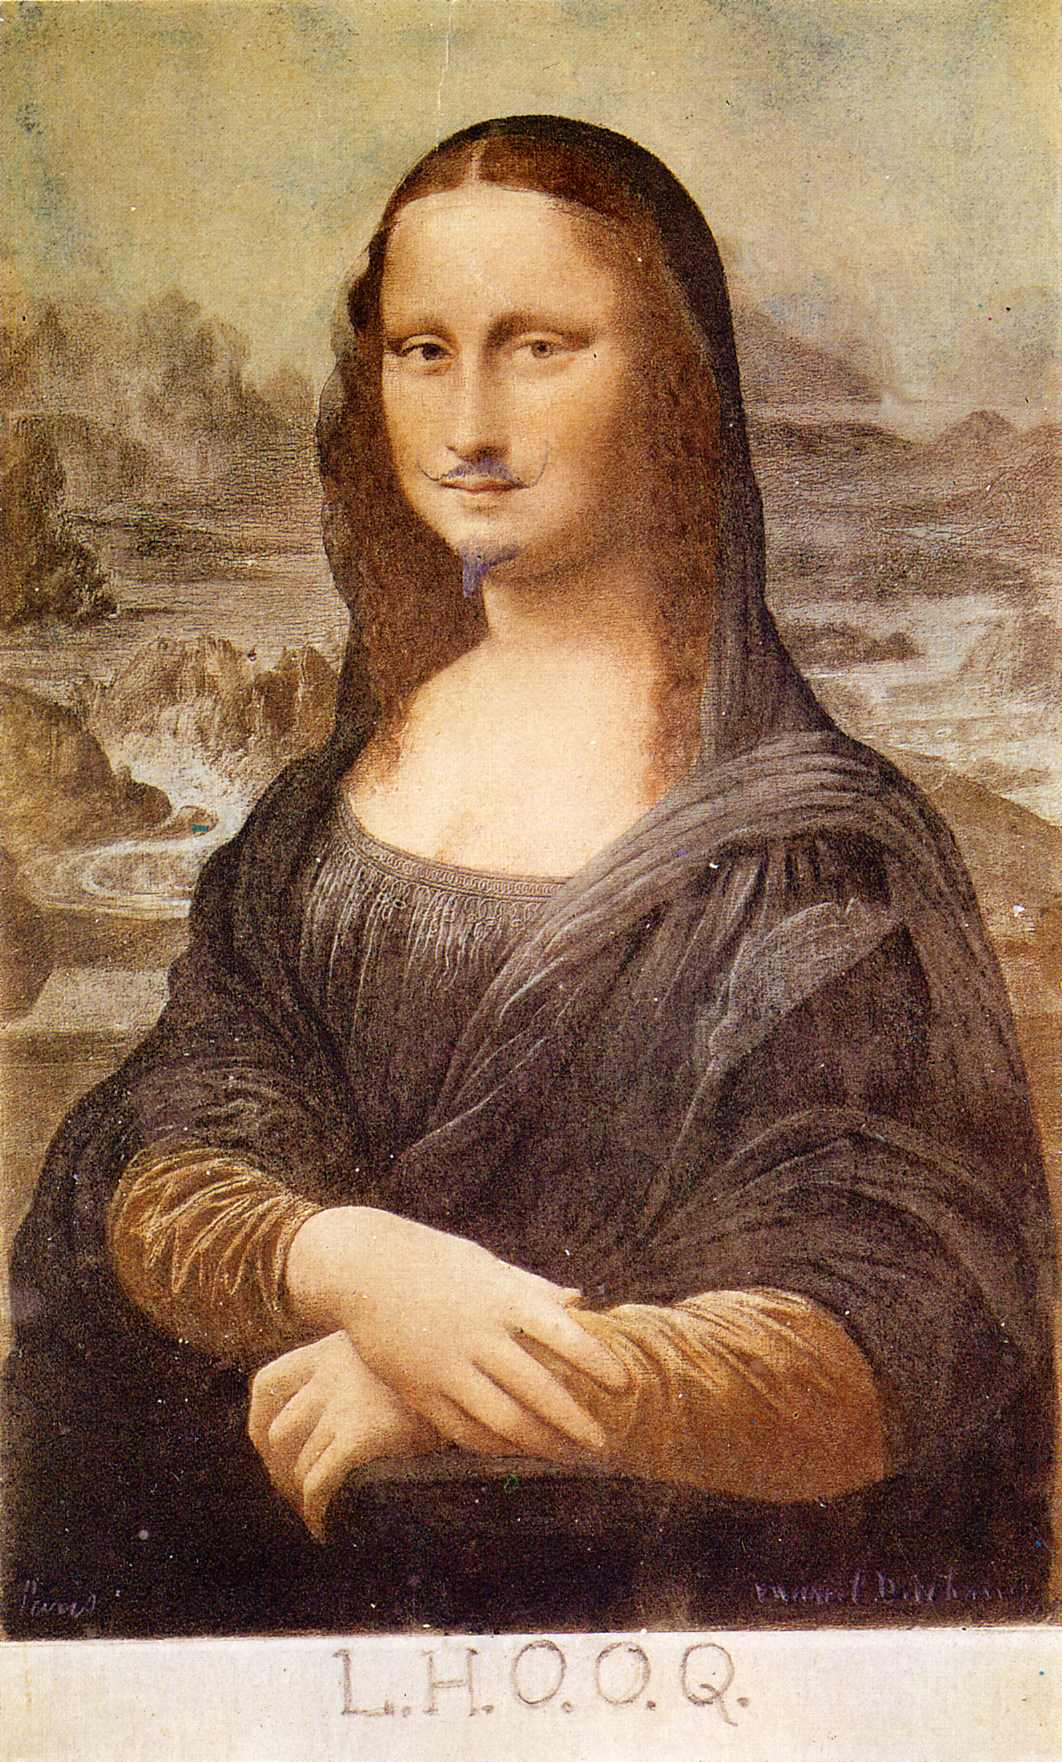
The most famous painting in the worldThe "Mona Lisa’ became famous because of her sort of smile, it is a unique smile that was noticed. Also the ‘Mona Lisa’ was stolen by a worker at the louvre and travelled the world so it was recognised by people after. It was found 2 years later in Italy and the theft made it even more famous. Marcel Duchamp added a moustache, beard and rude phrase (in a code). This also added to the fame of the painting.
He drew over Mona Lisa's upper lip and chin, and then re-titled the artwork. The name is a pun, and when pronounced in French says "She is hot in the arse", or "She has a hot ass". "Elle a chaud au cul" is a vulgar expression implying that a woman has sexual restlessness. He drew on a moustache as a joke to show his sense of humour and how he liked wordplay. I think Duchamp was saying that he saw the male form in the female. I think readymade means the art that are made by normal objects. L.H.O.O.Q. is a readymade because a painting that had already been made has been changed, edited. Marcel Duchamp's idea of the readymade is a revolutionary idea in art because even the smallest changes to a piece of artwork can change the meaning of it. |
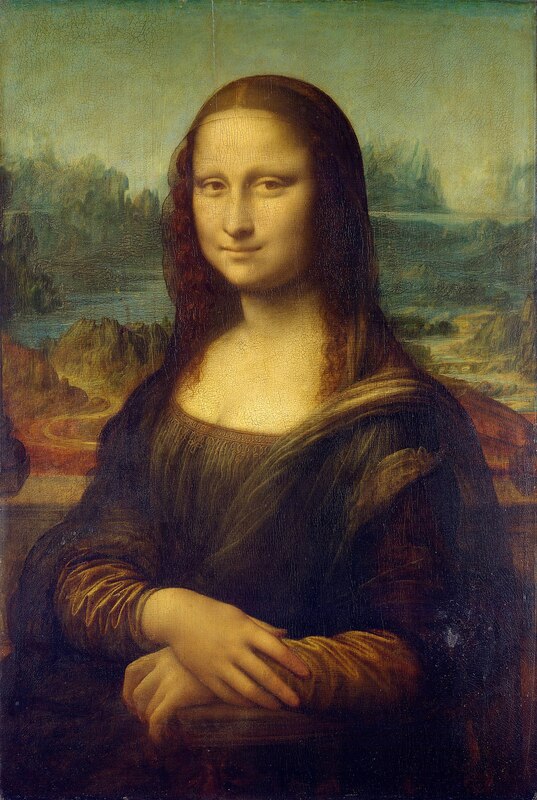
Leonardo da Vinci- Mona Lisa c.1503-1517
|
|
L.H.O.O.Q.This is one of Duchamp's Readymades, he used ordinary objects and then called them art. He even gave them titles and changed the objects positioning and then signed them. 'Readymade' doesn't give us the same idea in he way that artists change their work, it gives us the impression that we don't change our work. Lots of people think that people have to make things with different techniques in order for it to be art, for it to be expensive and pretty.
Duchamp has just drew on a moustache onto one of the most famous paintings in the world and it is considered to be 'art'. By Duchamp choosing normal objects and calling them art. It was his way of testing people's ideas on what art was. |
Kensuke Koike
Kensuke Koike is a japanese artist who works in Venice . He takes images and then uses different techniques e.g cutting, tearing, punching, slicing, re-assembling. Here are some examples of his work:


Experiment 1
We looked at images from Kensuke Koike and then we experimented cutting images in his style.


|
WWW:
I used Kensuke Koike's style and tried to cut my images in a similar way |
EBI:
If i didn't cut the image so small because it was really hard to stick back in and it was uneven. |
Experiment


|
WWW:
I cut my photo and used other artists ideas |
EBI:
If i used more backgrounds |
Hannah Höch -The Beautiful Girl
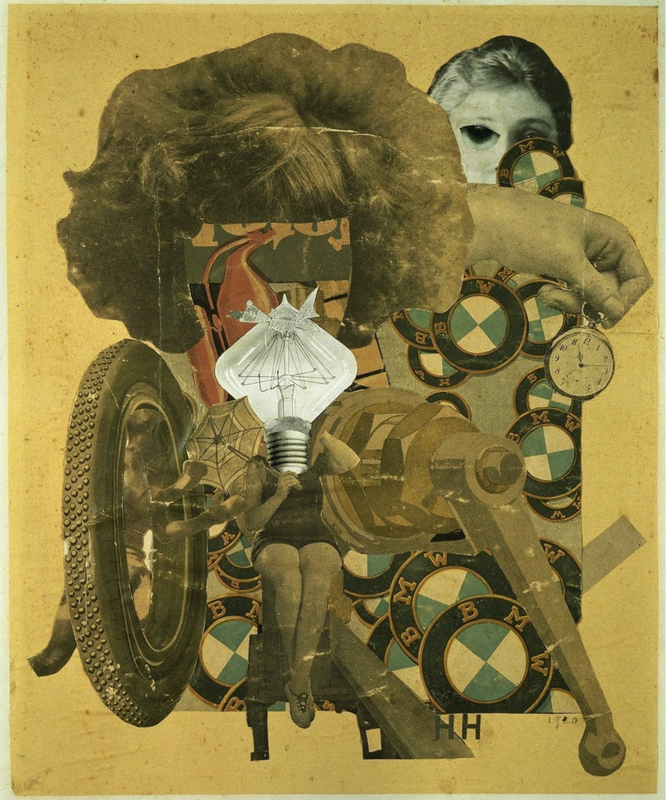
In this image, I can see various parts of a woman's body and an old racing car arranged together. I think the car is an old-fashioned racing car because there is a clock on the right of the image and clocks when put near or with a car normally have something to do with racing. In the background of the collage there are lots of BMW badges. At the top left, there is a woman's hairdo but with no face. Instead of the face there are parts of a poster. There is a hand coming out from the hair holding a stopwatch. Under this I can see a woman's body but instead of a head, there's a light bulb, like a bulb to go in a car for the outside lights. To the left of that there is a tyre with a figure coming out of it, but you can't really see what the figure is exactly. Next to this there is a piston with nothing attached to it. The woman's body with the light bulb is the most important part of the picture for me because the light bulb is the brightest part of the image and I think that there is a reason for this. I think it means that women can be smart or smarter than men, they are also important in society. In the collage, there are two types of images, parts of a woman and parts of a car. I think the title “Beautiful Girl” is interesting because I don’t think that people would think of this image when somebody says Beautiful Girl. The title helps us think about the meaning of the picture because the society promotes men as being better and smarter as women, everything is supposedly better about men, but women are smart, they can do things that men can, most people just don’t realise that. If I could rename this image, I would name it “Illuminating Women” because the light bulb is the most important part of the picture and I think the meaning of this image is that women are intelligent. This picture is trying to show this message. This image is thoughtful, interesting and unique. It is thoughtful because Hannah Höch obviously thought a lot about how she could portray women about being smart and important to society especially with sexism being a big thing in the world. It is interesting because she used parts of a car with parts of a womans body which you wouldn’t normally put together when trying to create a collage of a beautiful girl. Its unique because not many people would place the images in the way that she has. If I could ask the artist three questions, I would ask|: 1)Why did you name your collage ‘the beautiful girl’? 2) What is the real meaning of this image? And 3) Why did you choose cars to put in this collage?
3D > 2D > 3D > 2D
Matt Lipps
Matt Lipps is an american photographer and artist. His work is based between sculpture and photography. His photos are made from collages. He uses cut out images that he finds in discontinued photographic publications and magazines, arranging them to create images and collage.Then he takes a photograph of the final piece.


Daniel Gordon
An American artist who lives and works in Brooklyn, New York. He is known for producing colour photographs that are between collage and set-up photography. He creates work by cutting up images and arranging them in 3D positions. He has exhibited his work in solo exhibitions at the Zach Fleur Gallery as well as other places in New York and one in Switzerland. He has been included in the Museum of Modern Art, the Saatchi Gallery in London, Gallery 400 at the uni of Illnois. He is the author of Portrait Studio and Flying Pictures. He has also been a guest lecturer a Sarah Lawrence College in 2009.


My 3D Photocollages


Creating my own sculpture
I have used items I have found in my house to create a sculpture and then take a photo of it from various angles.


Collaborative Instruction Collage

- Cut or tear out 5 pages from your magazine. Choose pages with interesting images.
- Make a pile of these 5 pages on your desk.
- Take the top page and cut a hole in it (Note: it doesn't have to be perfect).
- Pass this cut out image to your neighbour (the person sitting nearest to you in class).
- Put the page with the hole in it at the bottom of your pile.
- Take the (new) top page and tear it in half. Pass one half to your neighbour (the same one as before) and put the other half at the bottom of your pile.
- Take the (new) top page and cut out a shape (Note: you could cut round an object or simply cut a random shape of your own choosing).
- Keep the cut-out shape, putting it at the bottom of your pile, and pass the page that remains to someone 3 places away (Note: make sure you don't end up with your own page).
- Take the (new) top page and tear a strip from the (top or bottom) edge. Keep the strip and pass the remaining page to someone else in the room.
- Place the A3 sheet of cartridge paper in front of you (portrait format).4
- Without altering them, arrange the pieces of paper from your pile on the A3 sheet to create a pleasing collage. Carefully photograph your first arrangement.
- Again, without altering them, repeat this process, re-arranging the various elements on the A3 sheet until you are happy with the results. Photograph carefully.
- You may now swap 1 or 2 elements with your neighbour. Make a new arrangement and photograph carefully.
- You may now adapt the pieces in any way you like - cutting, tearing etc. Make a new collage, this time sticking them to the A3 sheet of cartridge paper.
- Photograph your finished collage carefully.


Abstract Advent


Prison Photography
|
|
Klavdij Sluban chooses to share his knowledge of photography with teenage inmates around the world. He chose to do this because he feels concerned as a citizen that jails exist in the world and when he does something he is aware of the fact that people are in jails and he wanted to do something. He came with an exchange that he came with photography to exchange with these inmates who don't have the luxury of dealing with art every day. The inmates use the single use cameras to create their pictures. He thinks that photographing 'nothing' is exciting and interesting because it is therapeutical when they are taking pictures of themselves, their identities because some of them won't be able to get out , they're rebuilding themselves - helps to recover their identity. The students benefit because they get pushed to their creative extremes. They're used to being on a leash - getting told not to do things.When they get to something they have to get back. He pushes them into the world of creation where nobody can tell them to get back. They love it because it is a physical thing.
|
Six Frames
I watched another short film about Klavdij Sluban and his work in a Georgian prison. I screenshotted the 6 moments I thought told the story and the parts that I liked. Here are my 6 screenshots:


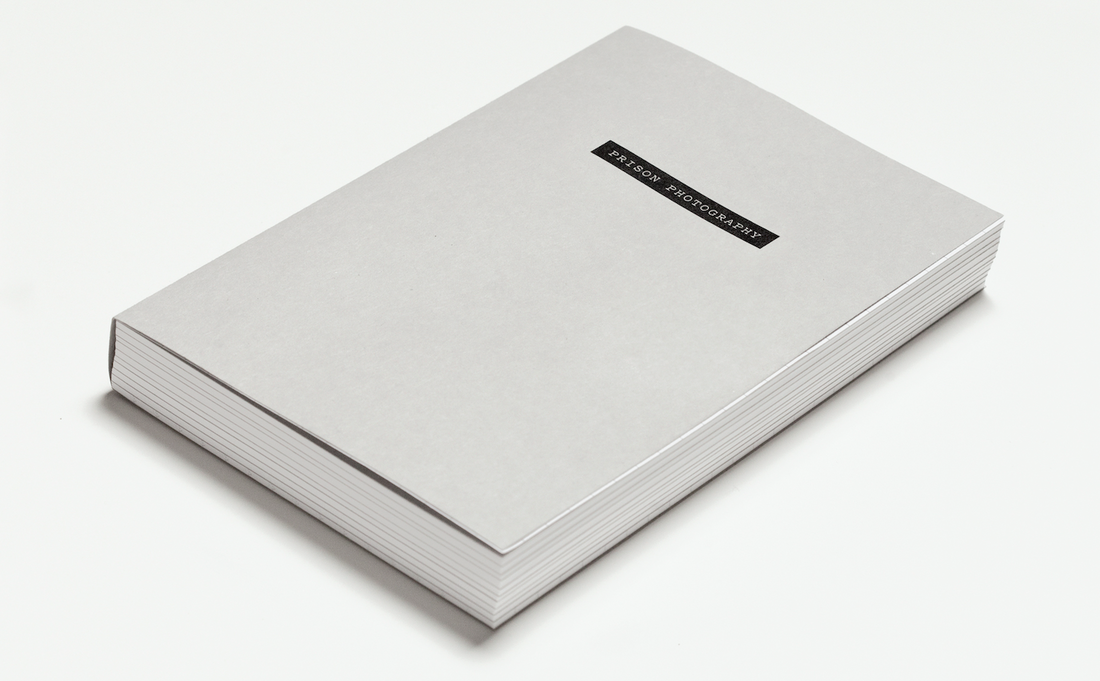
Prison Photography by Nicoló DigiorgisThis book was written by Nicolo Digiorgis' and the images below are from his book. The book is a collection of 137 shots taken by the inmates of the Penal Institution of Bolzano/Bozen Italy during the photography course taken by the artist between 2013-2017. Digiorgis tried to teach the inmates about photography, how to make pictures but also how to think about photographs' genres. The book is divided into themed chapters looking at a range of photograhic techniques and subjects.
|
|


Virtual trip to New York
We took a virtual school trip to New York using google maps and I took 10 screenshots of places that i found intersting.


Evaluation:
WWW: I took images that I would've taken if I actually went to New York
EBI: I took more diverse photos
WWW: I took images that I would've taken if I actually went to New York
EBI: I took more diverse photos
Experimenting with "found" photograph
We were given a photo and had to create photos following the instructions below:
- Hold the photograph in one hand and photograph it with the other
- Take a photograph of your finger pointing at something in the photograph
- Take a photograph of your photograph with light reflected on the surface
- Take a super close-up photograph of your photograph (so that the edges are not visible)
- Photograph your photograph in an unusual location
- Photograph your photograph inside a book
- Photograph your photograph peeking out of someone’s clothing
- Put the photograph under a chair leg. Take a photograph of it
- Cover the photograph so that only a small part of the image is visible. Make a photograph
- Ask someone to hold the photograph in front of their face. Make a photograph
- Write a message on the back of the photograph. Photograph it
- Photocopy your photograph (enlarge by 300%)
- Photograph the photograph on top of the photocopy
- Make a paper aeroplane from the photocopy. Fly it. Photograph it where it lands
- Scrunch the photocopy into a ball (image on the outside). Photograph it
- Submerge the photograph in water. Photograph it
- Tear the photograph in half. Place the two straight (untorn) edges next to one another and make a photograph
- Tear the two halves in half again. Place all the straight edges next to one another. Make a photograph
- Place one piece of the torn image on the palm of one hand. Photograph it
- Throw all four pieces up in the air. Photograph where they land


Evaluation:
WWW: The images that I took came out clear and how I wanted them to be
EBI: I forgot to take image 12 so next time i need to make sure i take the right amount of photos.
WWW: The images that I took came out clear and how I wanted them to be
EBI: I forgot to take image 12 so next time i need to make sure i take the right amount of photos.
Google Street View part 2


Google Street View Bingo
We played google street view bingo and we were given a place to go to and find the subject that was randomly picked. Here is the places and subjects we had to look for and below that are the images i took:
- Taipei - Fruit
- Rome - Graffiti
- Nairobi - Sport( I didn't find any images of sports in Nairobi)
- Brasilia - Water
- Athens - Yellow Car
- Kingston - Arrow
- Taipei - Tall Building
- Helsinki - Animal
- Asmara - Person Pointing
- Paris- Coca Cola sign
- Lima - Bridge


My Personal Project
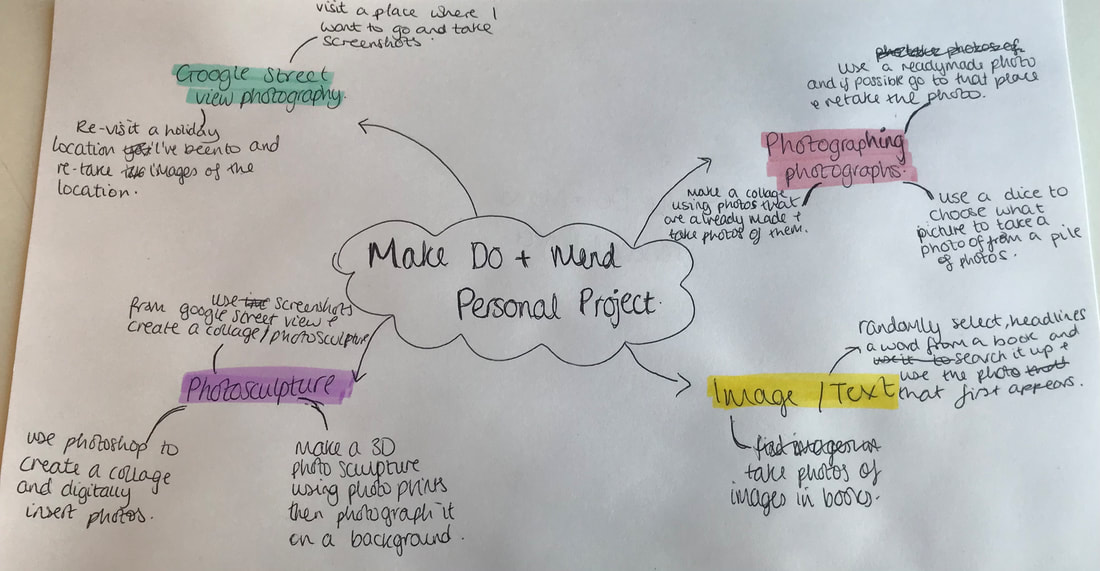
For the next six weeks we are going to be we are going to be working on our personal projects and we are choosing what type of photography we are going to be doing e.g photographing photos, google street view photography, collages, image/text, chance photography. Before we get started we have to mindmap all our ideas of the options on what the projects can be based on. My mindmap is below:
Blindfold Collage Challenge
Today we created three different collages but we had to do two of them blindfolded and we had different time limits on each one. We did this because with Covid we have a lot of restrictions and rules to follow so we made restrictions and rules and made a collage with what we could. We were given multiple photos and because we couldn't see we had to feel the paper for its edges and the textures of it . I didn't know what the end result would look like so i didn't really know where to start off at first. As the time went on i got used to not being able to see what I was doing. When i took the blindfold off for the first two collages I was really suprised because they didn't turn out horrible like I thought they would. They weren't great but I think they were good for the rules and restrictions I had to work with.
The first collage was done blindfolded and we had 15 minutes to do it, the second one i was feeling a bit better at doing it blindfolded and we had 5 minutes to do it and our final collage we didn't do blindfolded and we had 2 minutes to complete it. I didn't really have a favourite but i liked the first two blindfolded collages the best because they looked neater which is strange because I did them both blindfolded . My last collage that wasn't blindfolded was a bit hectic and all over the place but it was ok.
Here are my collages:


My collage
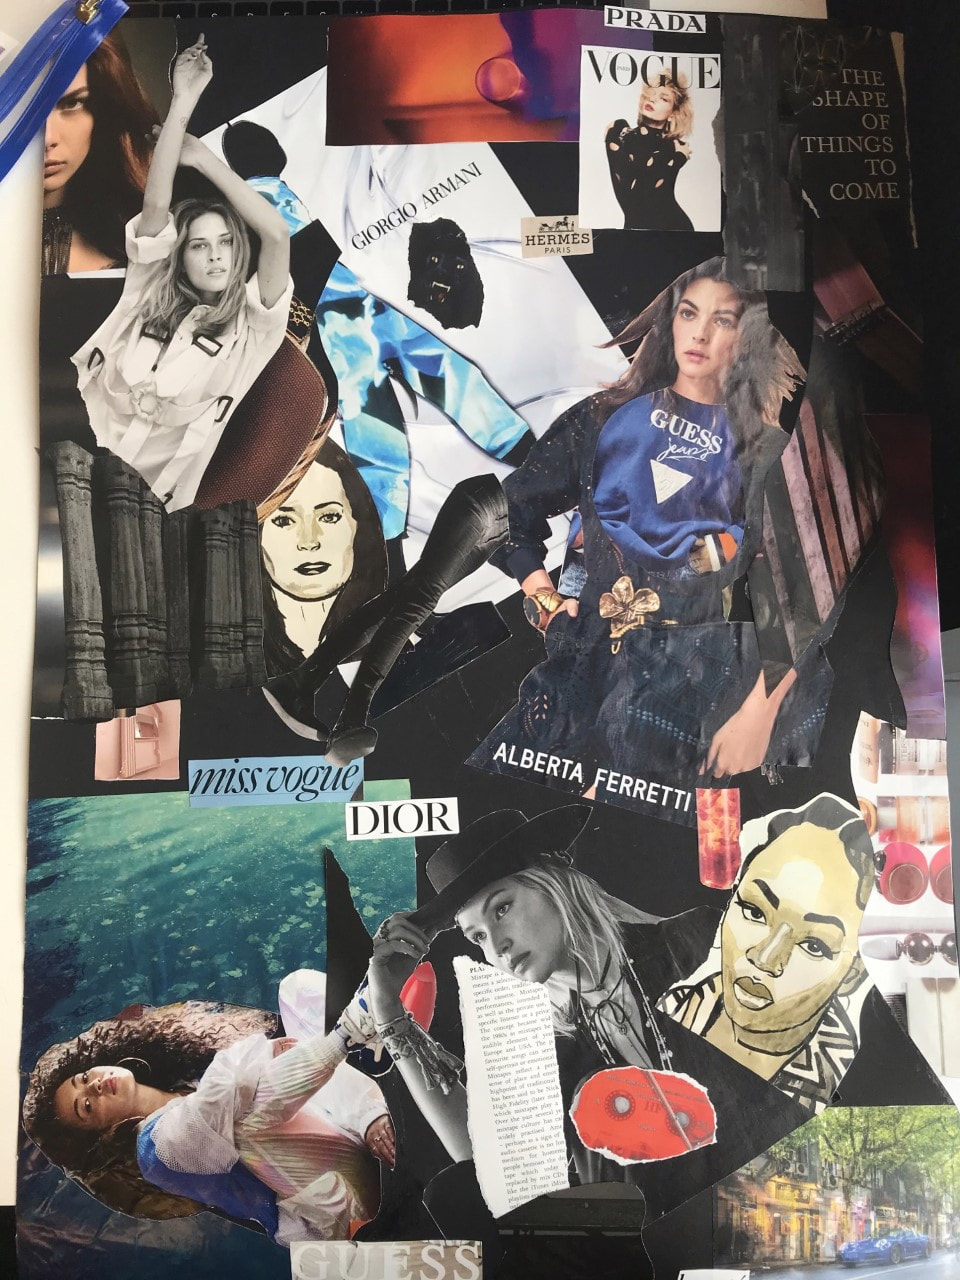
For my personal project , I am making a photo collage about fashion because it is an area which I have recently become more interested in and lots of magazines feature fashion and clothes. I have been using photos that I found in fashion magazines and thought were interesting. Here is the beginning of my collage


Over the next couple of weeks I have been working more on my collage and this is how it looks now:
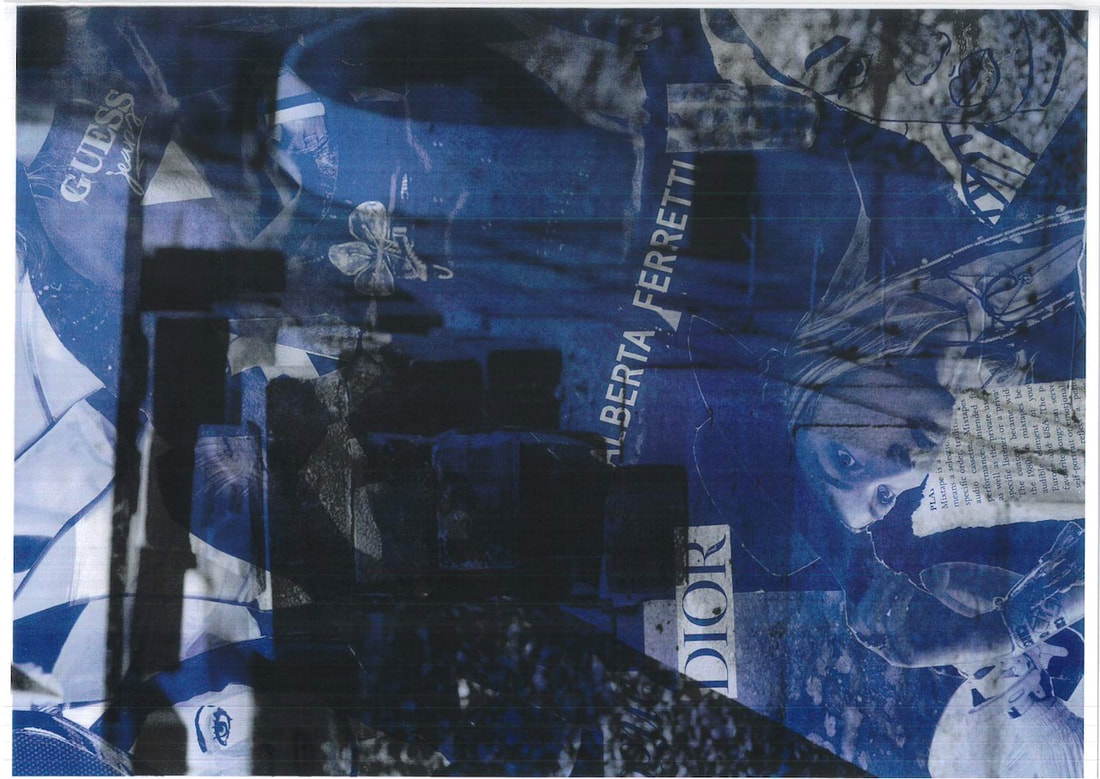
Once I was happy with how my collage looked, I photocopied parts on different colours and layered them. I made about 4 then started cutting them up to make some 3D collages.


Today I put my collages on a backdrop, with artificial light and made an animation of me moving them around.


Making Day: My photo-sculptural installation
Today I have photocopied some enlarged parts of my collage onto different colours and then used chance and picked out six random photos and copied them on top of my coloured photocopies , then mounted in onto card then cut it not fully so that the card can bend so it can therefore stand up. Here are what the photos look like :


|
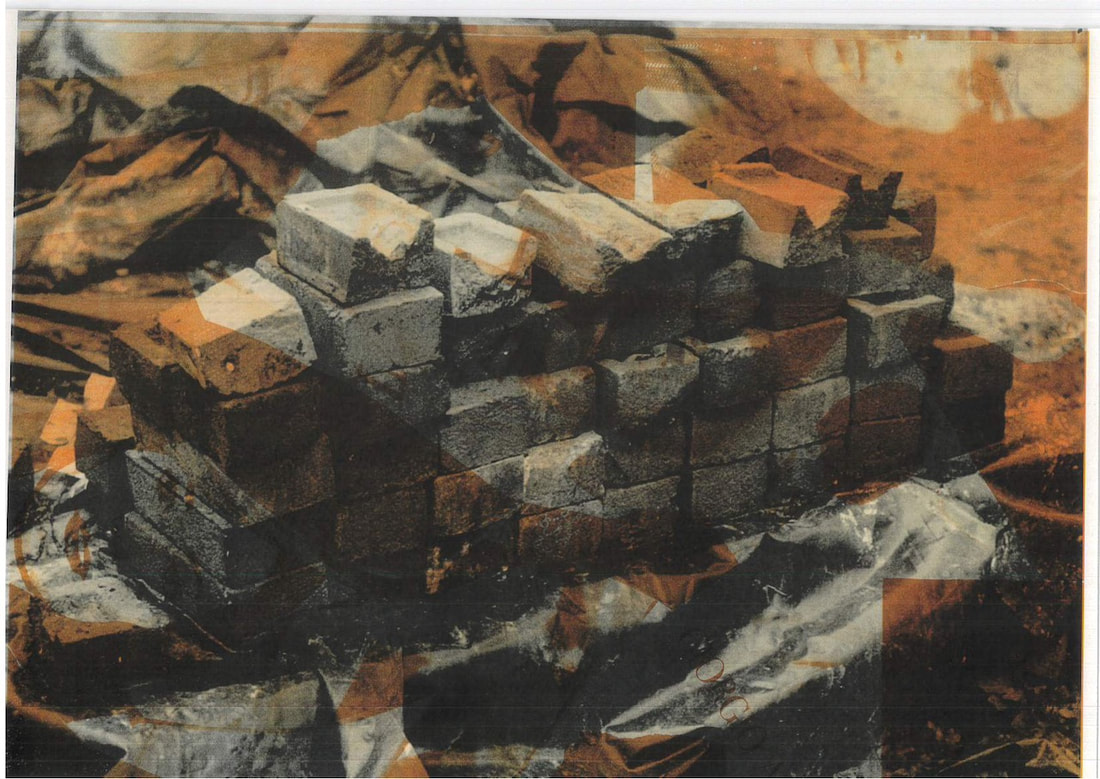
|
The two images above were ones that I had made as I explained at the beginning and I used these two as backgrounds for my 3D sculptures I was going to make. I then went into the studio, projected my background photos and then used some big white blocks to arrange my sculpture on. I arranged them in different positions and then took photos which are below. After I used pink cellophane to make to projected image a different colour. I really liked the pink background colour because it made the photo-sculptural installation look more interesting and something that would catch someones eye, something that is interesting to look at. What I've done is taking something 3D and then squashed it into a 2D photo, then made a sculpture with them - making it 3D again- only to take a photo making it 2D again. I have also projected one of the images I made onto the background of my photo-sculptural installation. Everything In my photo-sculptural installation is made out of pieces from a magazine, random photos which I picked without looking at and I've managed to use it to create something that I am really happy with. This year we have been focusing on making do with what we have and mending it or using it to create something different. Because of covid we have been limited with what we can do and use so we have had to use photos that have already been made and use it. This has been quite challenging because I am so used to taking my own photos and then using them to create a collage or a sculpture. But using photos that has already been made has been quite interesting because in a way it is easier to find photos but it also takes longer than taking your own photos and using them. Below are photos of my photo-sculptural installation:


Evaluation
During these six weeks we have had to stick to restrictions and rules in order to complete our personal project. I am really happy with the outcome of my project and what I managed to achieve within the time period we had.
Firstly I made my collage about fashion which was something I had recently become interested in. I made my collage using photos from magazines that we had in the classroom and arranged them onto black card.
Over the next couple weeks I added more photos and cut them in different ways in which i thought looked interesting. Once I finished with my collage I used the photocopier to take copies of random parts of my collage in a different colour and also in enlarged parts, I then added another layer of photo on top but with a contrasting colour.
Once I had made a few of these I mounted the on card and then used the to create a 3D collage. This was part of me experimenting what to do with my collage for my final piece. The photos for my first experiment are early on in my project above.
We then had a making day which gave us the whole day to make something using my collage. On the making day I photocopied my collage in different random enlarged parts with different colours and then for my second layer I got some random photos and copied them on top of my copied images.
But this time, I just copied them over in black and white. After this, I cut lines and shapes into the image but didn't cut it all the way through and mounted the image on card so it would be easier to stand up.
I then went into the studio room and projected one of my photos onto the wall as the background and got some blocks to put my 3D collage on. I placed the images in various positions, and looking at interesting shadows I could make .
I was really happy with the photos that I took and what I had managed to achieve in the time we were given.
